Parents searching for Montessori activities for 18 month olds want a list they can follow. What makes this age different is that three developmental windows are open at once.
Your child has a pull toward purposeful movement, order, and early language. The right activity targets one of those windows directly.
That’s why a well-set-up tray holds attention when a room full of toys doesn’t. I’ll cover what to set up, how to present each activity, and when to rotate them.
Start with the developmental picture.
What Are Montessori Activities for an 18 Month Old?
At 18 months, three sensitive periods are active at the same time. Your child has a strong pull toward purposeful movement, a deep need for order, and a fast-growing vocabulary.
Montessori activities are designed to meet those windows directly. That’s why a well-chosen tray holds attention in a way that a toy box rarely does.
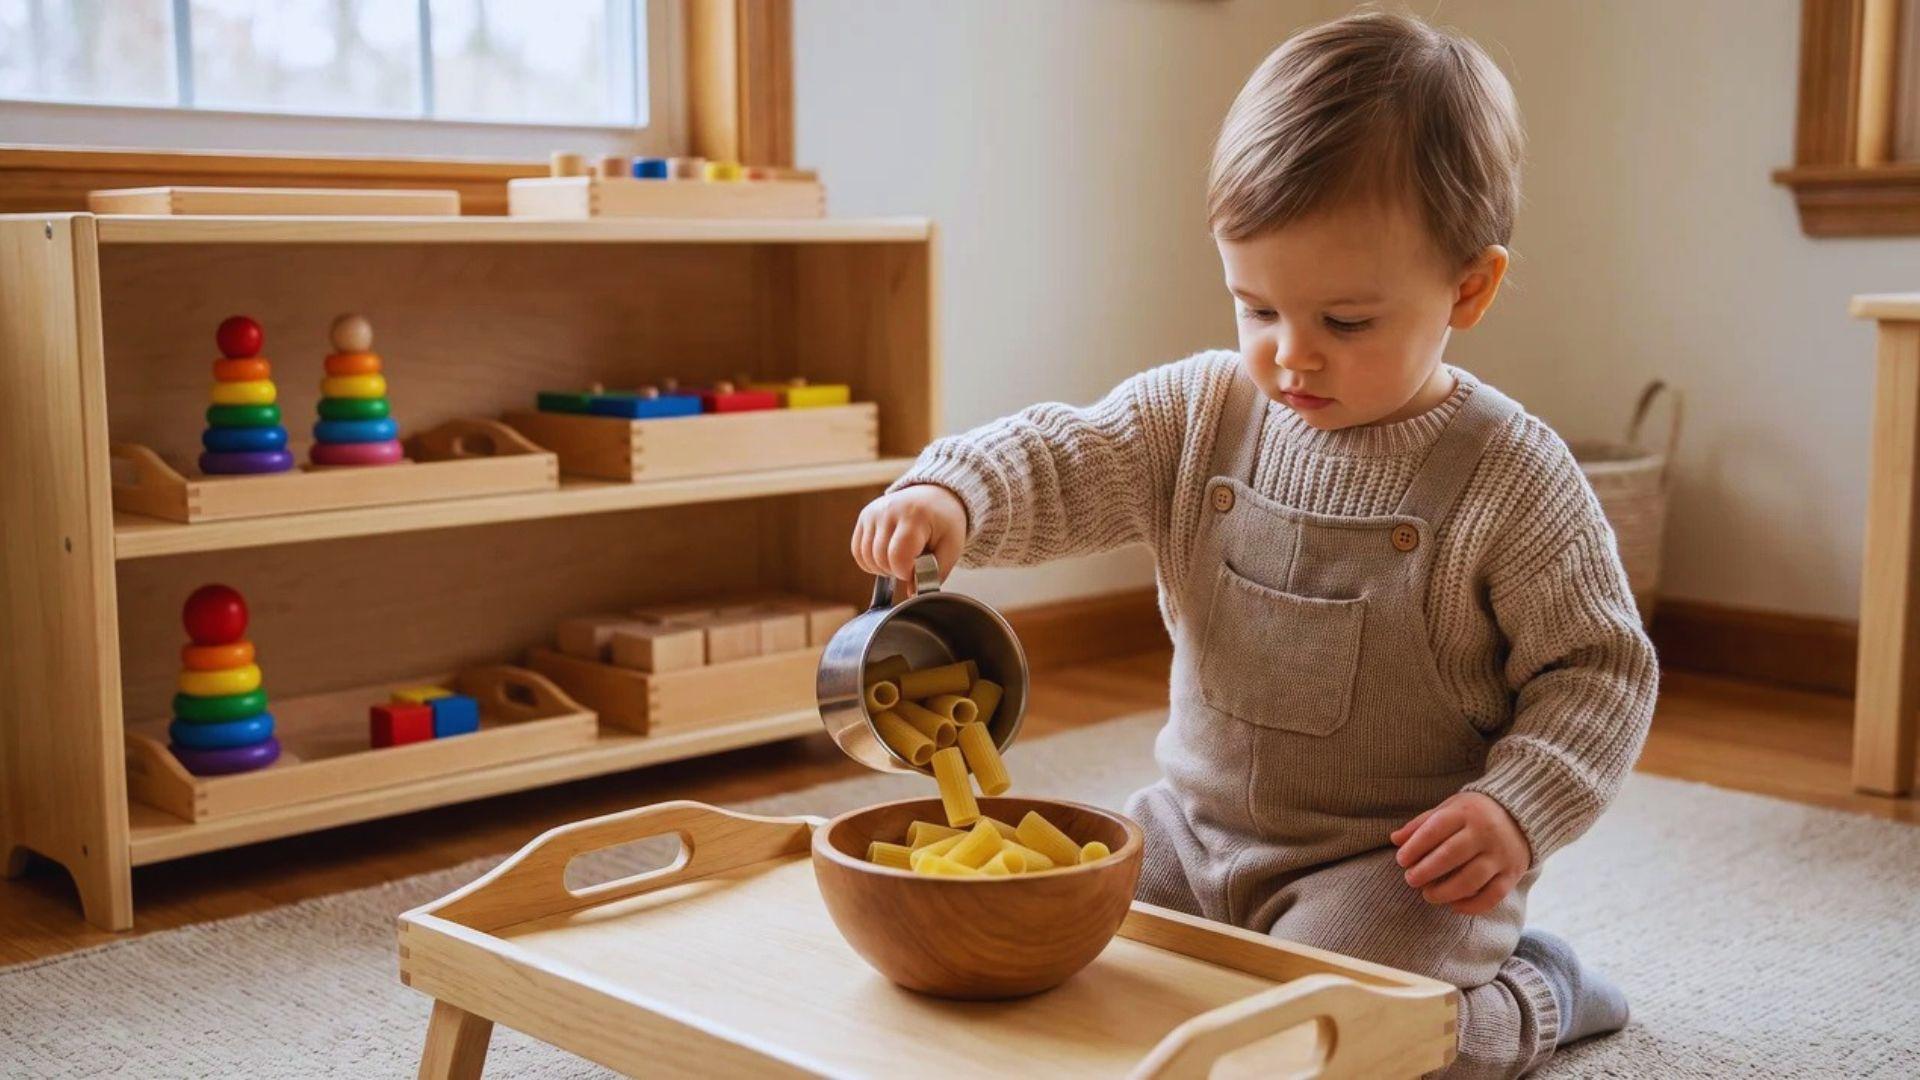
The sensitive period for movement shows up as a drive to do real tasks, not pretend ones. That’s what makes pouring actual pasta into a bowl more compelling than pressing a button on a toy.
The need for order means your child feels real satisfaction when an activity has a clear beginning and end. A tray with a defined workspace gives that. A random pile of objects doesn’t.
Early language at this stage is tied to objects your child can hold and examine.
Language activities here use real miniatures paired with picture cards for exactly that reason, not flashcards alone.
These same principles often begin earlier than most parents expect; many of the activities to do with a 1 year old build directly toward what you’ll set up here.
Before you set up any tray, sort the environment. A low shelf at child height with 3-5 trays works well. Arrange them left to right, each sitting on its own mat.
The materials across this guide are simple: Pitchers, bowls, a sponge, wooden objects, picture cards, and a knobbed puzzle.
Practical life is where most of that movement and order drive shows up first. These are the trays worth setting up before anything else.
Practical Life Activities That Build Real Independence
Practical life activities give your 18-month-old real-world tasks with real objects. That’s what makes them different from most toddler play, and why they tend to go longer than you’d expect.
Every tray follows the same setup: one material, at child height, arranged left to right. Hold off on tools. Adding a spoon or tongs before the basic motion is solid ends the activity.
Pouring and Transferring

Two small pitchers and a shallow tray are all you need. The tray catches spills so your child can reset and keep going without asking for help.
Set it up this way:
- Place the full pitcher on the left, the empty one on the right
- Fill with large pasta, like penne or rigatoni
- Your child pours left to right, tips the pitcher upright, and repeats
- Progress to smaller materials only when the wrist motion looks steady: small pasta first, then lentils, then rice
That progression takes weeks per step, not days.
Don’t add a spoon or funnel to make it easier. The pour is the point. Simplifying the task removes the exact challenge your child is working to master.
Sponge and Water Work

Two shallow bowls and a sponge. Simple to set up, genuinely demanding on an 18-month-old hand.
Here’s how to prepare it:
- Place two small, shallow bowls side by side
- Add just enough water to cover the bottom of the left bowl
- Your child squeezes the sponge to pick up water, then wrings it into the right bowl
- Keep the water level low throughout: too much tips the bowl
When spills start getting rare, add a second sponge with a different texture to extend the tray.
The squeezing motion builds grip strength your child will carry into other tray work.
It also asks for two-hand coordination at once: one hand squeezes, one steadies the bowl. That’s more demanding than it looks.
Kitchen Participation and Environmental Care

Both are practical life work. They give your child a real role in a real environment, and that’s what holds attention at this age.
For kitchen tasks:
- Use a learning tower to bring your child safely to counter height
- Offer peeling soft foods like bananas, stirring dry or cool ingredients, or washing unbreakable cups
- Skip anything involving heat, sharp tools, or wet foods that need squeezing
Those tasks are right for 24 months and beyond, once grip control is more reliable.
For environmental care:
- Give your child a small damp cloth and a low surface to wipe
- Baseboards, low shelves, and windowsills work well
- Keep the cloth slightly damp, not wet
A soaking cloth is harder to control and less satisfying to use. A lightly damp one lets your child actually see the surface change as they work.
Once the practical life trays are running, the shelf needs activities that work on smaller, more precise skills. Fine motor, sensorial, and early language work fill that gap.
Fine Motor, Sensorial, and Language Activities
Fine motor activities at 18 months work best when they isolate one hand skill at a time. Language work means pairing a real object with its picture, not presenting a card alone.
Posting, Slot Boxes, and Transfer Activities

Each tray in this group isolates one hand motion: slot-dropping, pinching, or twisting.
Pick one of these to start with:
- Wooden coin box: Large, smooth coins drop cleanly into the slot. Good first option.
- Spice jar with Q-tips: Same dropping motion, narrower target, slightly harder.
- Pom-pom transfer: Move large pom-poms from a bowl into an ice cube tray using fingers only.
- Oversized nuts and bolts: Add once the pinching motion is steady across other trays.
All objects must be large enough that they can’t be swallowed.
Wrist rotation and pincer grasp are still developing at this age. One motion per tray keeps the task achievable.
Adding a second hand skill too early is the most common reason a tray gets abandoned.
Object-to-Picture Matching and Color Sorting

Both trays work on the same principle: your child needs to hold the real thing before the picture means anything.
For object-to-picture matching:
- Put the figurine in your child’s hand first
- Let them hold it, turn it, and look at it
- Then place the matching picture card beside it
- Use 3–5 figurines per session, paired with clear photos rather than illustrated cartoons
At 18 months, words attach to real objects before they attach to pictures of them. Placing the card first skips that connection. The label doesn’t land.
For color sorting:
- Set out one colored bowl each for red, blue, and yellow
- Invite your child to sort matching objects into each bowl
- Once all three are consistently correct, add one neutral: beige, grey, or white
- Let your child decide where the neutral belongs
That last step is the shift from matching to classifying. Your child has to make a judgment, not just copy what they see.
Simple Puzzles and Opening-Closing Work

Both activities build problem-solving through repetition. Piece count and motion type are what keep them right for 18 months.
For knobbed puzzles:
- Stay at 3 to 5 pieces
- Start with a shape or simple animal puzzle with large, clear knobs
- The knob lets your child grip and place each piece without needing precise pincer control
More than 5 pieces tips the tray from challenge into frustration. Keep it small until completion starts looking effortless.
For opening-and-closing work:
- Set up one mechanical motion per tray: a container lid, a zipper pouch, or a latch board
- Twisting, pulling, and flipping are three separate trays, not one combined activity
- Rotate through them across sessions rather than presenting all at once
Each motion is a separate skill. Mixing them removes the focus your child needs to work through each one properly.
Tray work covers the hands and mind. Your child also needs a physical outlet that asks for full-body effort, and that requires the same intentional setup.
Gross Motor Activities for Maximum Effort and Balance
Gross motor activities are not breaks from Montessori work. They are the movement component of a complete daily environment, as specific in purpose as any tray on the shelf.
Climbing and Balancing Setups

Climbing needs a safe outlet at 18 months, not a redirect. Setting it up intentionally is part of the prepared environment.
For climbing:
- A Pikler triangle is the standard option: it supports pulling up, going over, and coming down
- Firm couch cushions stacked on the floor work well as a starting alternative
- Keep the height achievable with effort: too many layers and your child stops trying
The same principle applies here as it does to trays. The challenge should be just within reach, not beyond it.
For balance:
- A low balance beam works well if you have one
- A strip of tape on the floor gives the same footing challenge at no cost
- Let your child walk it at their own pace, without guidance
Heavy Work and Movement Routines
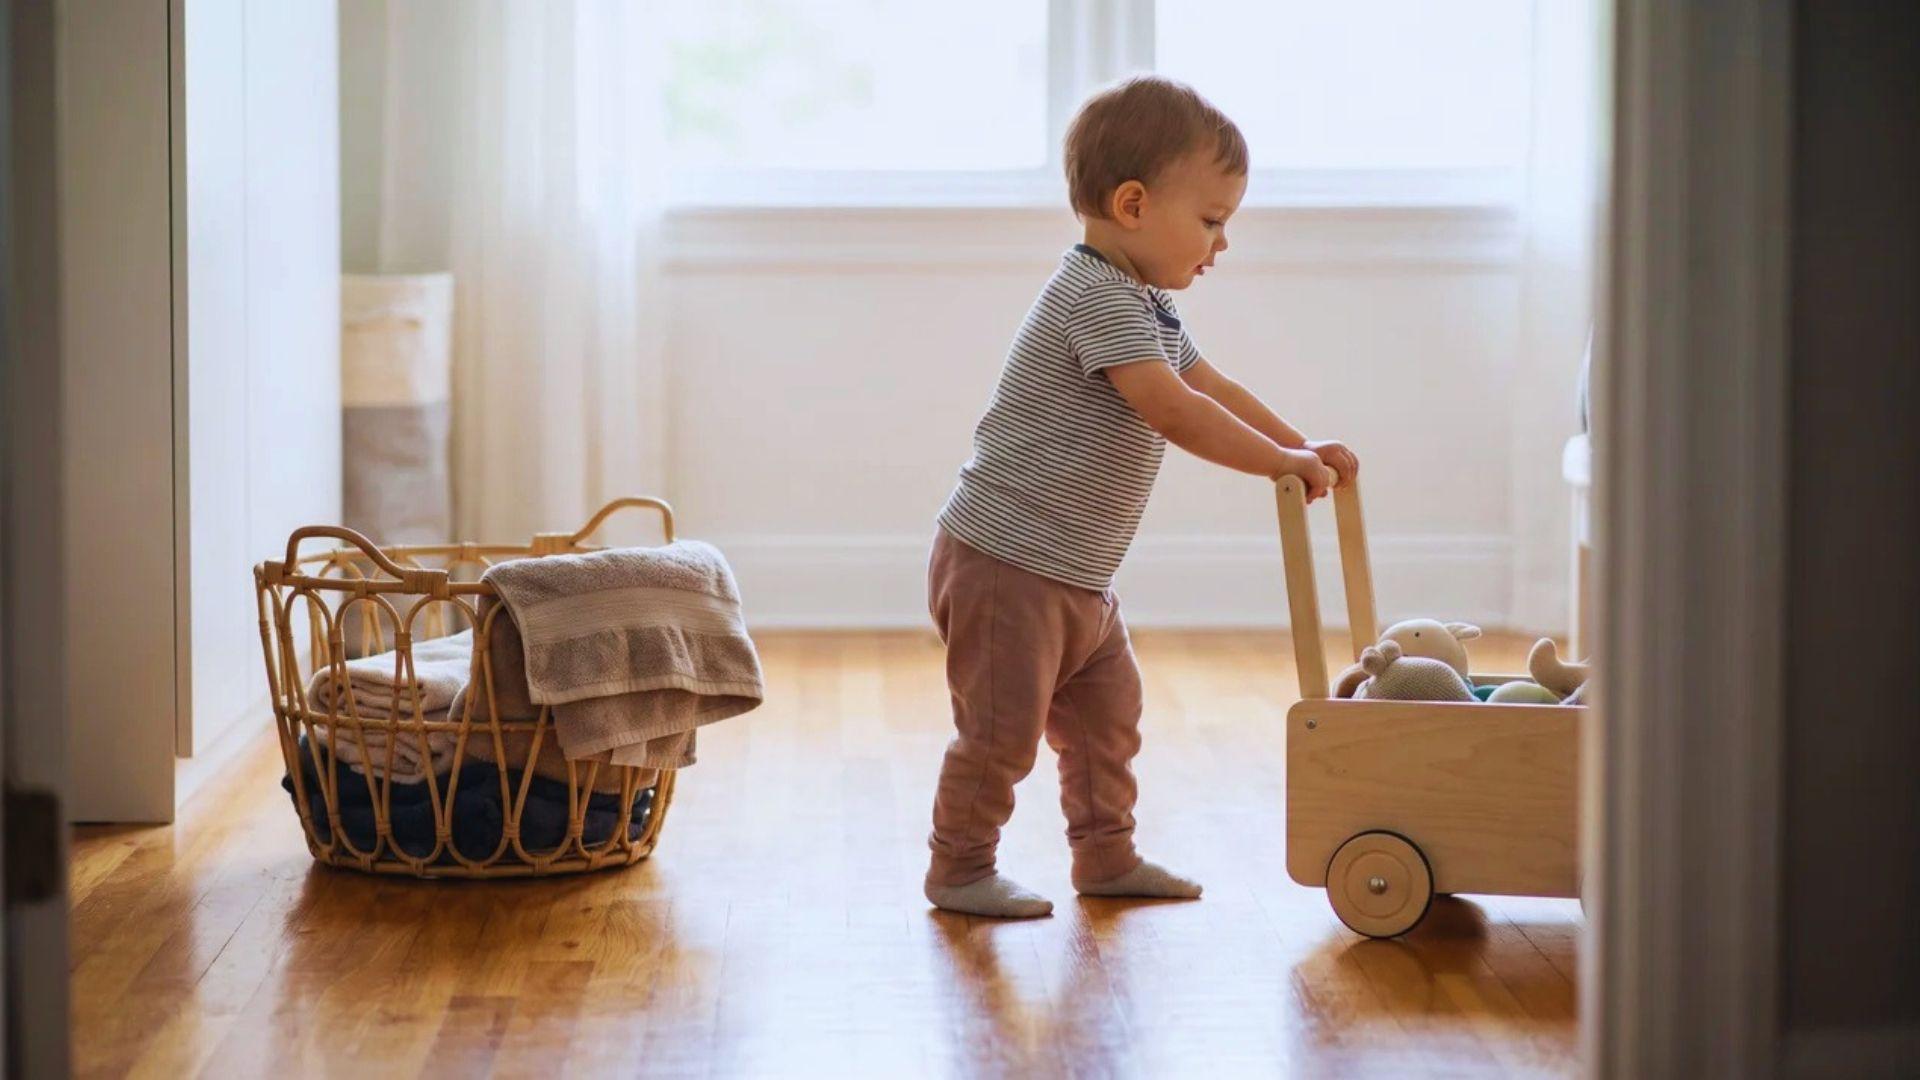
Heavy work meets your child’s drive for maximum effort. Carrying, pushing, and dragging build body awareness through a different kind of demand than tray work does.
The simplest way to include it is to stop removing it from your child’s day:
- Hand your child a small laundry basket to carry to the hamper
- Let them push a lightweight wagon from one room to another
- Step back in the moment you’d normally step in
It doesn’t need a place on the shelf or a scheduled block of time. The moment you’d usually say “let me do that” is often exactly when your child should be doing it.
Heavy work built into daily routines develops the same independence that practical life trays are designed for.
Having the right activities on the shelf is only part of it. How you introduce each one determines whether your child works independently or waits for you to lead.
How to Present Activities and Build a Weekly Rotation

How an activity is introduced determines whether it becomes self-directed work or adult-led play. A slow, silent demonstration before your child touches the tray is what makes the difference.
The Silent Presentation Method
Before your child touches the tray, you demonstrate it first. How you do that determines whether they engage with it as independent work or wait for you to lead.
Follow this sequence:
- Sit beside the tray, not across from it: your child needs to see the motion from the same angle they’ll use when they take over
- Work at one-third of your normal speed: every motion deliberate, no rushing
- Stay silent throughout: no narration, no naming what you’re doing, no invitation to watch
- Stop when the sequence is complete: place the pitcher down, pause, and wait
- Step back when your child moves toward the tray: that movement is the handoff
The most common mistake is talking through the demonstration. The moment you speak, your child’s attention shifts from the motion to your voice. The work stops before it starts.
Going too fast is the second thing that breaks it. At full speed, the motion is invisible. At one-third speed, it becomes something a child can actually track and reproduce.
If your child misuses the materials:
- Close the tray quietly
- Don’t explain, redirect, or correct
- Reintroduce it after a few days
That’s the correct response, not a problem to solve in the moment. Turning it into a conversation makes the tray a negotiation.
Closing it quietly preserves your child’s sense of ownership when it comes back.
A Simple Weekly Rotation Framework
Start with 5 to 7 trays on the shelf at one time. That number keeps the environment engaging without overwhelming your child or you.
A working distribution for this age keeps one activity from each category available. Here’s what that looks like:
- 2–3 practical life trays (one pouring, one water work, one kitchen or environmental care)
- 1–2 fine motor trays (one posting or slot activity, one transfer tray)
- 1 sensorial or language tray (color sorting or object-to-picture matching)
- 1 gross motor support (climbing setup or a heavy work route)
This gives your child access to each category without piling everything out at once.
Swap 1 to 2 trays each week, not the whole shelf. Replace what gets ignored or finished instantly. Keep what’s still being repeated.
Mastery is your signal, not time. When a tray is consistently finished in under a minute without interest, it’s ready to come off the shelf.
As your child approaches two, a daily schedule for a 2-year-old can help you map tray time against the rest of the day.
A new tray always goes in on the left. Your child will notice it.
Final Verdict
Montessori activities for 18 month olds work because they match what your child is already driven to do. You’re not creating interest from scratch. You’re giving it somewhere useful to go.
The setup matters less than you think. The presentation matters more than most guides admit.
Start with one tray this week. Watch what your child does with it before you change anything.
That observation is where Montessori actually begins. Not in the materials, not in the shelf. In the decision to step back and let your child lead.
Frequently Asked Questions
What time of day works best for Montessori tray activities with a toddler?
Morning tends to work best, when focus and energy are highest. Avoid tray time right before naps or meals, when frustration tolerance is low.
Do I need to buy Montessori materials, or will household items work?
Most activities at this age use ordinary items: pitchers, bowls, sponges, and dried pasta. A coin box or knobbed puzzle is worth adding over time, but nothing specialist is needed to start.
How long should an 18-month-old focus on one activity?
Three to ten minutes is typical, though deep concentration can last longer. Short sessions are not a problem. Repetition across days builds focus more than duration in a single sitting.
Should I stay in the room while my 18-month-old works on a tray?
Stay in the room but move away from the tray. Leaving entirely can shift your child’s attention from the activity to your absence.